WIRING UP YOUR LIGHTS
Before powering your Sensory Bridge, you’ll need to install your own WS2812B-compatible LED strip if you aren’t using a Mini Mast.
All WS2812B-compatible LED strips have three wires in these colors:
Addressable LED strips like this have both an input side and an output side. Be sure that you’re wiring the input side to your Sensory Bridge, otherwise the LEDs won’t function properly!
If you are using a 4-wire “DotStar” style LED strip, you’ll need to use the “CLK” screw terminal as well, and reconfigure your device in an upcoming step.
Here is the typical wiring color scheme of a 4-wire DotStar strip:
It’s likely that your strip came with a connector on the end - this must be cut off, and the wires stripped back by ~4mm for the best results.
While the advice in this section is likely correct in 99% of cases, ALWAYS double check the labelling and color scheme of the wires in your own LED strip to be sure that nothing will be damaged.
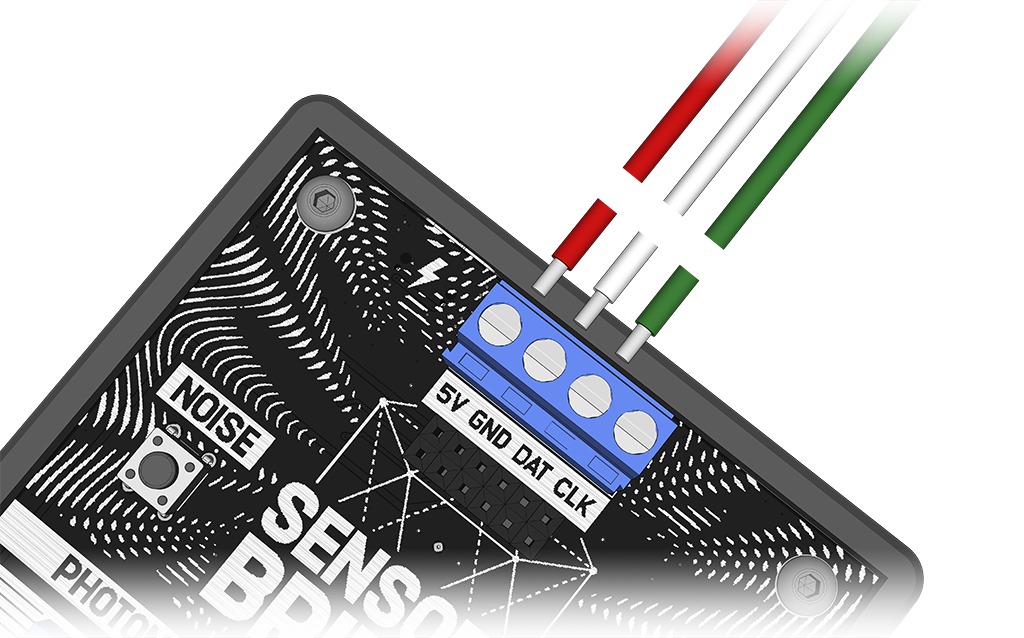
Once the wires are stripped, insert them into the LED terminal as shown, tightening the screws down on the wires as you go. Be sure that none of the bare wire is exposed, so that it cannot short-circuit with itself. (If you’re using a 4-wire strip, be sure to hook up all four wires correctly.)
Some strips have duplicate wires for 5V and GND. These can be wired to a separate power supply, individually covered with electrical tape, or doubled-up into the corresponding terminals if you plan to power the LEDs using only the Sensory Bridge.
Now let’s plug this thing in!
Plugging In For The First Time